Learn a little bit more about the difference in trail and climb difficulty rankings!
Subscribe to your YouTube for weekly outdoor educational content!

Learn a little bit more about the difference in trail and climb difficulty rankings!
Subscribe to your YouTube for weekly outdoor educational content!
Grays and Torreys are some of the most popular 14ers because of their close proximity to I-70 and Denver. Even on a Monday during shoulder season the parking lot was nearly full by the time we arrived at 6:15am. 4WD/AWD and high clearance is a must. The road is steep and rutted out. I didn’t bring my jeep on this particular trip so I left my sedan at the 2WD trailhead right off the freeway and hopped in a friend’s SUV to carpool to the upper parking lot. While it was great weather and a fun day, I wish I had taken the advice of some friends of mine and done Kelso ridge to Torreys rather than the standard route. I think it would’ve been way more fun, and I very much encourage anyone who enjoys some class 3 fun to do Kelso ridge.

We started off that early October morning just before sunrise, it was chilly, the first snow had capped the peaks. It took us about an hour to hike the first mile and a half to the information sign just below 12,000′. We watched the aplenglow engulf the high peaks, as we continued our way up through the glacial basin.

Once we made it to the shoulder on Grays, it was a simple follow up the switchbacks in the snow to the summit. Unlike some other class 1 peaks, this was a fairly straight forward climb. No real false summits. Spikes helped stick to the icy snowpack. We summited Grays in 3 hours with amazing views of Evans, Bierstadt, the Mosquito, Sawatch, and Elk ranges.


After a brief snack and photo break on the summit we headed down the north shoulder of Grays toward Torreys. The descent was quick, maybe like 10-15 minutes, but the climb up Torreys was steep and annoying. It took about 35-40 minutes to climb torreys from the saddle. Since the trail faced the sun, it was dry. The scree trail wasn’t too bad, but it was a bit of a grind and made me wish I had taken the Kelso ridge route instead. I actually really enjoy class 3 scrambles as long as its solid. Walking up a steep scree ridge was kindof boring frankly.
Luckilly, there are no false summits for Torreys on the standard route either. It was a quick straight shot up the shoulder to the summit. the similar views continue, with the added view of a snowy Grays Peak. The weather was simply perfect! Sunny skies, and little to no wind. The Kelso ridge route was clear from the summit and could be seen the entire way up and down the standard route.

We hung out on the summit for a bit before heading back down to the saddle to meet up with the bypass trail. Descent took a little over an hour and a half back to the car. We saw a number of ptarmigans on the tundra and again, overall it was a goregous day and I was glad to finally check these two off my list. After climbing Longs the first time at age 13, Grays and Torreys were supposed to be my next 14ers during high school. We were on our way when we got weathered out. I had wanted to climb them ever since so it was bitter sweet to make them #14 and #15 for me!

What a cool peak! Wetterhorn was a blast. This might be my #2 favorite fourteener now because it was so much fun! My favorite part was definitely the infamous final pitch and would do it again in a heartbeat.

This was an all nighter adventure for most of us and we were all feeling it by the end. That Friday evening, I drove from Salt Lake, my climbing partners drove from Denver, and we met up in Lake City and headed immediately to the trailhead aiming to summit by sunrise. We parked at the 2WD trailhead before all loading in my friend’s 4Runner to climb the super sketch 4WD road to the upper trailhead. (High clearance vehicle DEFINITELY needed) We started hiking by about 3am and while we were taking our time, we were still making great time as the first 2 miles breezed by in less than an hour. The trail was very well marked and easy to follow in the dark.

Navigating the boulder field on the way up to the saddle was a bit trickier to follow in the dark, but easy in the daylight. The trail is still fairly visible and easy to see in light as we came down, but we did get off track a tiny bit on the ascent in the dark as it was harder to see. Once on the ridge, the trail heads up a steep sandy section before entering the class 3 section. Navigating the class 3 section felt a little like a choose your own adventure. There were a small handful of cairns sparsley laid out, but getting up to the flat spot really was up to you as long as you stayed infront of the rock rib. Some of us tried to climb the rock rib thinking we were already at the notch… Not Reccomended. Ended up in some class 4 territory for a second and had to backtrack.

After navigating the ridge for some time and watching the sun begin to rise behind Uncompahgre, we made it to the flat spot just before the notch. This signifies you are like 10 minutes from the summit and you can see it right infront of you. After climbing the notch, and butt-scooting down the slab, you come to the base of the final pitch which has super solid holds and feels like your climbing a natural ladder. This was definitely the coolest part of the route. Comparitively, I would say this was steeper than the homestretch on Longs Peak, but easier and shorter as the homestretch gets SUPER slippery and feels way more exposed. As steep as this pitch on Wetterhorn is, it feels a bit enclosed as you climb and you don’t feel as exposed as it looks.

We came up on the summit at 7am, just in time to see the sun finally come up over Uncompahgre. The morning views were spectactular and we even found out later, a nearby climber on Matterhorn snapped a photo of us on the summit!
Heading down that final pitch wasn’t as nerve wracking as one would think. It is so fast and you’re done before you know it. Navigating the remainder of the class 3 section was much easier to follow on the downhill as we could see the route below us. After that, the trail was once again easy to follow back to the car.

Overall, I freaking loved this peak. It was such a fun climb! Highly reccomend for those new to class 3 peaks, I thought this was a fairly mild class 3 and would be a great first one for those working on their fourteener climbs and working into more technical climbs. 4WD and high clearance definitely needed to get to the upper trailhead (we were nearly sideways at one point). If you must start at the lower trailhead, it will add a little bit of extra mileage.
Happy Climbing!
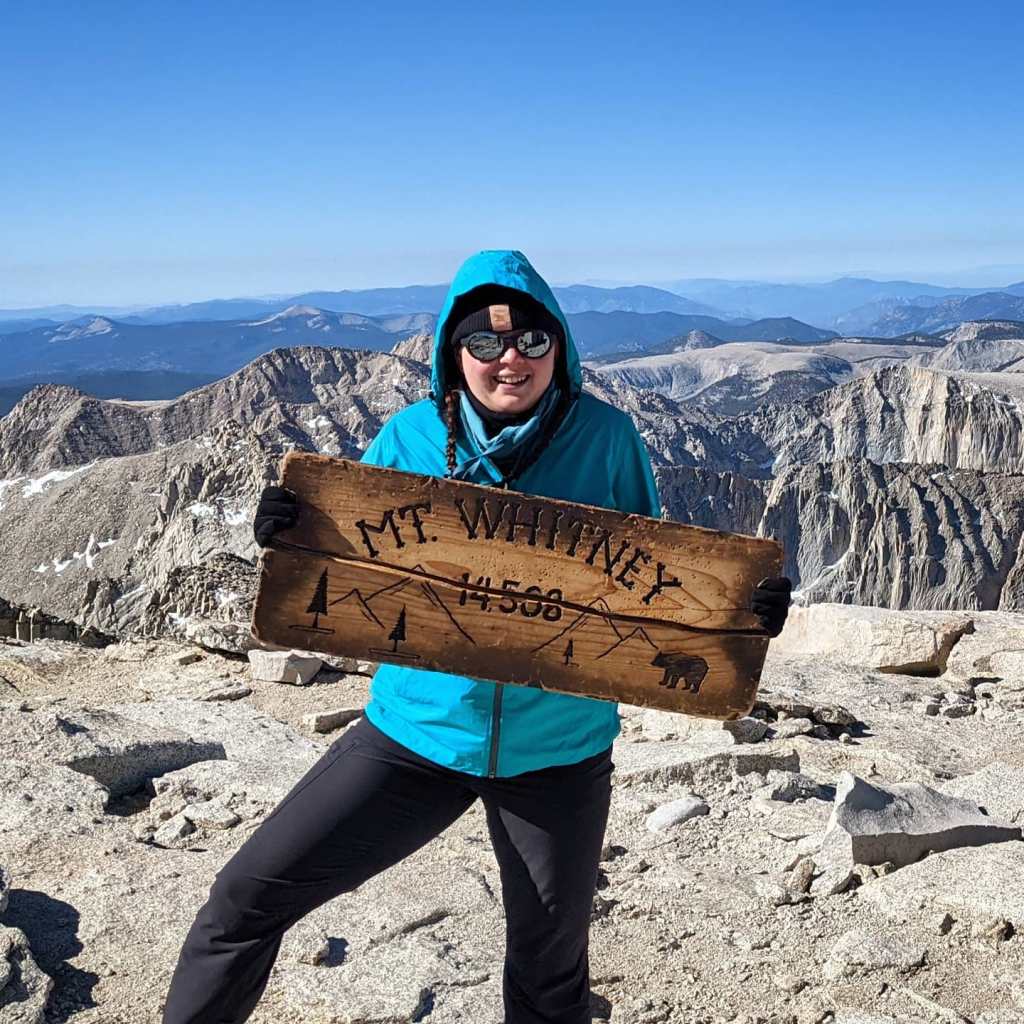
Climbing the highest peak in California and in the contiguous US was quite the adventure! Not only did we climb Mount Whitney, but we traveled through Death Valley National Park and Badwater Basin (the lowest point in the US) to get there which made for a pretty cool way to mark this off the list. Almost 14,800′ of gain in less than 24 hours. This trip is one I most definitely reccomend, but there are some things you should know before you climb.

Whether you aim to climb Mount Whitney in a single day, or backpack in and camp, Whitney is a permitted climb no matter which route you take. They have a lottery system in place for permits at Recreation.gov that opens Febuary 1. According to the Inyo National Forest site, only 34% of applicants were awarded their requested dates in 2019. Each year more and more people apply, lowering the chances of success. Once permits have been awarded March 24, remaining applicants do get first dibs at whatever dates are leftover on April 1. Web sales open May 1 and people have been lucky to occasionally find something that is left, but they typically go incredibly fast.
Mount Whitney is located in southern California. Depending on whether it is a La Nina vs El Nino winter can actually help determine how much potential snow Whitney can hold in a given year. I summited June 10th which typically would warrant early season conditions with plenty of snow, but with a record dry year, and high heat, our route was virtually snow free. Heavy El Nino years can mean there is snow at Trail Camp and up the cirque of the 99 switchbacks well into August. When you apply in Febuary, take a look at snow water reports for California, as well as future forecasts for the remainder of spring to give you a guestimate of what the summer may look like as you plan your climb. Typically the later in the summer you go, the better your chances are at a snow free route. However, the later into summer you go you also risk monsoon season and will be racing weather on your climb. Always check weather and conditions before you go. Bring microspikes (and possibly an ice axe) if there is still snow, and always watch the clouds as you do not want to be on the high mountain in a thunderstorm.
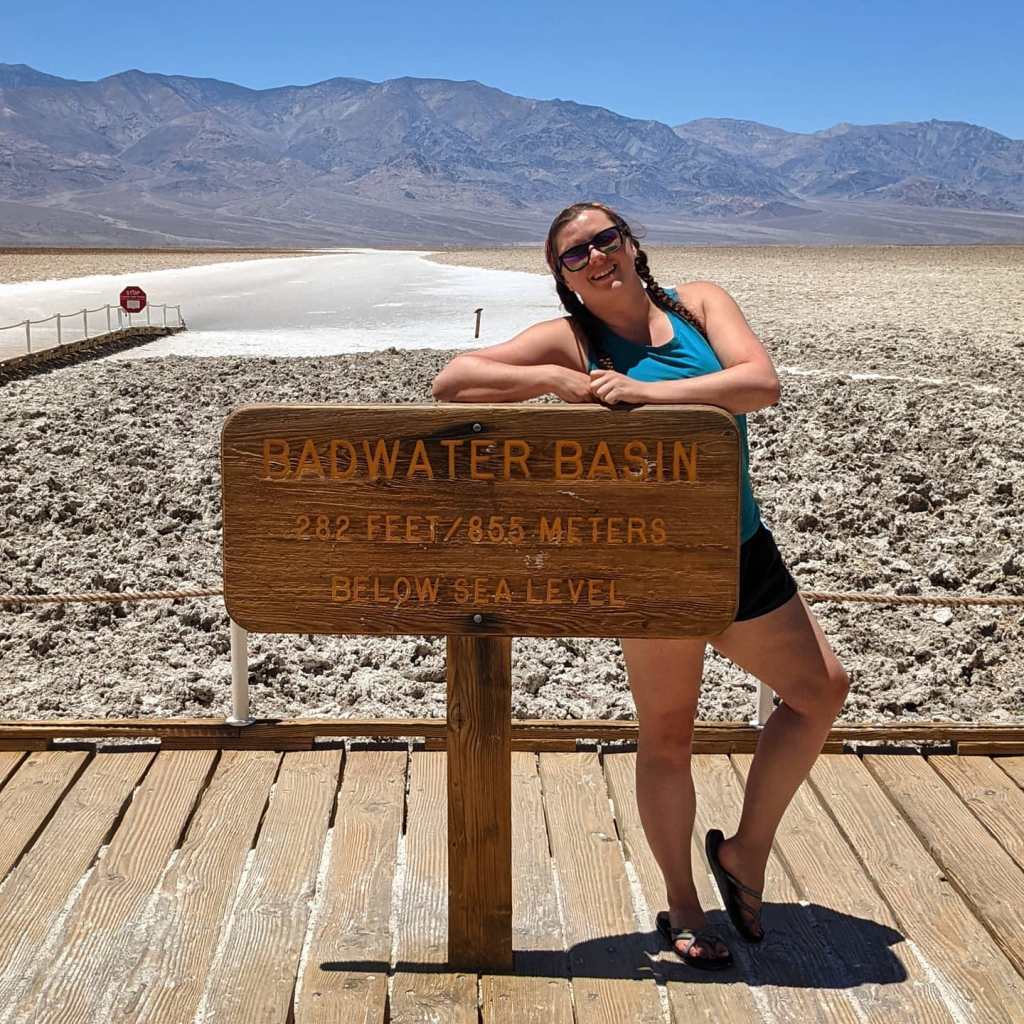
Coming from Utah we had a few different options for driving to Whitney Portal. The fastest reccommended route went through central Nevada where there is essentially nothing. However for just about an extra hour of detour, by taking I-15 south to Vegas, we could drive through Death Valley on our way and hit up Badwater Basin, which is what we decided to do!
Initially, I personally had ZERO desire to ever visit Death Valley. It’s notoriously hot, and I don’t do well with heat. But with it literally being on the way, and having the opportunity to hit the lowest point and then the highest point, we couldn’t pass it up. We lucked a little bit with the weather as it was incredibly windy and cooler than usual (by cooler meaning it was 102 degrees instead of 122). I was also pleasantly surprised at what all the park had to offer. I was very much expecting just a desolate valley wasteland and I had no idea there were petrified sand dunes, and incredibly textured prominent peaks that looked like they were out of Star Wars until we got there. We whitnessed a couple dust devils, and of course took a pit stop to the low salt flats of Badwater Basin, the lowest point in the US at -282 feet below sea level.
A quick note if you decide to go through this park ever (especially in the summer): have lots of water in the car, make sure your tank is full, your antifreeze is full, and your tires are good! It is the largest national park in the country and there is little to no cell service in the park and would be a terrible place to break down.
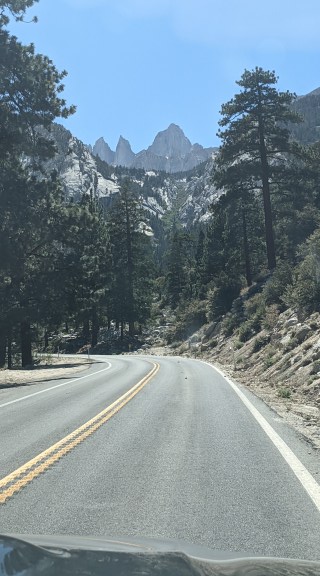
After our adventure in the desert, we made the remaining 2 1/2 hour drive to Whitney Portal, located just outside the town of Lone Pine. Car camping at the trailhead is not allowed. There are about 25 walk-in campsites located at the portal. A little further down the road is Lone Pine campground. Those spaces are reservable and is a cool place to camp with all the rocks. Whitney Portal is in active black bear territory. You cannot leave food or anything smelly in your car, bears have and will break into cars. There are bear boxes in the parking lot to store your food while you hike which is really conveinient. There is a little gift shop and grill at the portal it seems like their hours vary just a little from season to season. Currently they are open until 6:30pm so if you return from your hike before then, definitely reward yourself with a burger! It will taste so good after a long day on the mountain.
We started our climb at midnight. When we initially arrived at the portal the afternoon prior, it was insanely windy. Gusts at the summit were topping 80-90mph. People coming down that evening looked absolutely hammered and defeated. The winds were forecasted to die down overnight and by sunrise be reduced to sustained winds of maybe 10-15mph rather than 45-50. We prepared for wind and cold, however we severely underestimated just how cold and how windy…

There are several landmarks that can help break up this long hike, especially if you opt to do the climb in a single day like we did. Something important to note as well is that AllTrails is off by a couple miles. We used Strava to track and found it was a grand total of 23.4 miles round trip. Checking several other reports as well as just monitoring our pace with experience, I think our Strava track was more accurate. The first landmark was the log bridges and Lone Pine Lake about 3 miles in. We were moving at a solid pace and arrive at the sign for the lake about an hour and a half into our hike. About a half hour and a mile later we arrived at Outpost camp area, and within another half hour and just shy of another mile we made it to Mirror Lake putting us just shy of 5 miles in a little less than 2 1/2 hours.

The next 2 miles were more brutal than I expexted. I thought we only had a mile left to Trail camp since I was going off inaccurate information, but in reality, we had 2 miles, and they were long and awkward. I dub this section the “Whitney Stairmaster 5000”. The trail steepens and becomes incredibly rocky. There are a couple landmarks such as coming up through treeline, “the meadow”, and “the traverse”, but it was so dark we couldn’t see anything anyway, and we were battling brutal winds. The higher we got, the windier and colder it got. This section also slowed us down. It took over an hour and a half to get through this section. Most of the trail was straight forward, but there were a few spots that tripped us up in the dark and we would have to stop and figure out where to go.
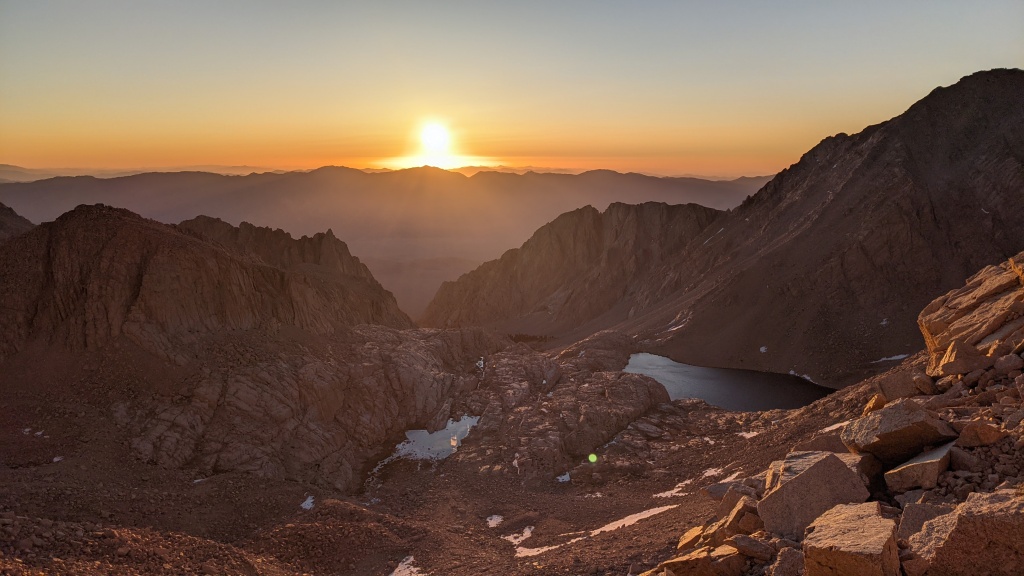
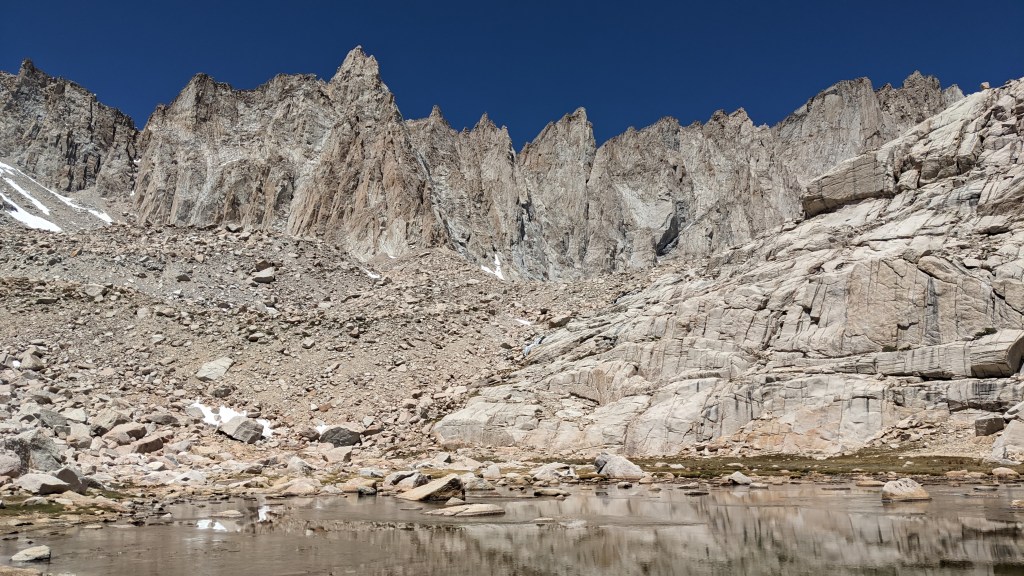
Finally, we make it to Trail camp at 12,000′ and nearly 7 miles in. It’s 4am and the winds were so cold, Trail Camp Tarn literally re-froze overnight. Our camelbacks were frozen and our waterbottles were becoming slushies. We took a pause under a rock trying to escape the unbearable frigid winds and debating our next move. We decided to keep going hoping that the 99 switchbacks would be somewhat sheltered from the wind because of the apparent direction it was coming from, and that the sunrise would bring some warmth and calm the winds as forecasted. We slowly made our way up the switchbacks, finding that once we were up several of them, they were slightly sheltered and gave us a bit of relief. We were at about 13,000′ come sunrise at about 5:30 and it was absolutely stunning. It really gave us a second wind to help us push on.

We made it to Trail Crest at 13,650′ and it was immedately back into the cold frigid winds as we transitioned to the shady back side of the mountain. Despite being freezing, the views of the west side with Guitar Lake were stunning. The trail drops down about 200′ (which was a bitch to climb back up later) to meet up with the junction of the John Muir Trail. We check the time at the junction to see it is 6:40am and we have just shy of 2 miles left to go. While most of the backside is fairly flat, its rocky, and uneven talus at high altitude making it slow, and for us, almost painful in those frigid winds. The final 500′ or so were probably the most brutal for us in the winds the entire climb. We were completely exposed to the full force of the wind, no more big rocks to hide under, and at this point it was just telling ourselves “we can warm up at the summit shelter and get out of the wind” that kept us moving.
We summited at 8:30am. When I checked the weather later I found out we still had 25mph sustained winds and gusts up to 40 on the summit at that time, making our windchill -4 degrees (literally a 106 degree difference from the day before). We didn’t stay long. We snapped some very quick summit photos, hiding on the leeward side of the shelter in between shots. We headed down at 9am and pretty much didn’t stop until we reached Trail Camp again at about 11am.
Here at the tarn, we took our first real break after 11 straight hours in the wind, only really stopping to catch our breath (and take summit photos). We hung out at the tarn for about an hour; enjoyed the warmth of the sun, ate some lunch, stripped some layers, took some photos, and finally took in what we just battled through, celebrating our crazy successful summit.
From here it was just a long 3 hours back to the car, but at least we got to see what we missed on the way up. Stumbling over rocks on the stairmaster 5000, We finally got to take in the views of the rocky terrain, see Mirror Lake, check out the Waterfall at Outpost Camp (that I didn’t even know was there on the way up), and see Lone Pine lake. The longest section was definitely those last 3 miles. While it only took an hour…. it was a mentally LONG hour to push through. It just never ends and you want to be done. With about a mile left I found I hit a spot with cell service on the traill and briefly called my dad and my husband to let them know I was almost down and to story tell of the crazy windy adventure we had.
Not including our summit break and hour long break at Trail Camp, it took us 13 1/2 hours total, though we spent about 15 hours on the mountain. About 8 1/2 hours to summit, 5 hours down which is about what I predicted. I was guestimating it would take us 8 to summit but those winds man… They will mess with your head and make you question your life choices.
As much as I would love to say this is a one and done mountain for me, I know it probably isn’t. I just hope next time there is less wind! XD
Patience was the key to this peak… in so many ways.
After FLYING up Bierstadt last fall, I made the mental decision that I wanted to complete some of the “easier” 14ers in the snow to add a bit of a challenge. Quandary was one of those peaks. For anyone looking to do their first snowflake, this is definitely a solid choice but be prepared to wait, and be patient.
I originally had planned to climb it in Febuary which would’ve made it a true winter ascent, but living in Utah there are a dozen factors that come into play before I decided to make the drive to a 14er. The weather for my drive has to be good, the avalanche conditions need to be safe, and the liklihood of a sucessful summit need to be realistic. When an artic blast hit Denver the week I was supposed to drive out, I decided to postpone. After that came the massive storm and avalanche cycles. I waited, and waited for the perfect weekend, and I think I chose pretty well!

I headed out Easter weekend. A fairly warm week had firmed up the snow, the high pressure was staying solid over the rockies, and there was little to no wind in the forecast. The perfect spring day!
We started at sunrise, which I highly reccommend doing at or before if it is supposed to warm thruought the day. This allowed the snow to be cold and firm first thing in the morning. We only needed microspikes and did not have to worry about postholing (until later).
As this was my first 14er of the year, and I really hadn’t done any uphill training this winter thanks to avalanche conditions, I took it nice and slow. The trail started out on the summer road, nice and mellow and quickly steepened once we officially started on the actual trail. It flattened out within 20 minutes or so having a nice lesiurely stroll through the scattered trees to treeline. We came to the inevitable fork where the winter route heads straight up the steep ridge rather than following the summer path into avy terrain. This is the most avalanche prone part of the entire climb so hitting it before the sun did was crucial. It is very RARE that the upper east bowl will slide because of how packed down and windblown it gets, but it HAS happened. See this thread on 14ers.com for more info. All in all it was about an hour to get above the trees and top out onto a flatter zone where we could now see the remainder of the route.


This is where it got long and slow. This is where patience was tested. This ridgeline feels like it is never going to end….. I would break down the remainder of the route into 2 sections. The first false summit, and the last 1000′ feet. Both of these sections were like an optical illusion, they just kept going! Every time you looked up above you it appeared no different. The perfect curvature of this ridge made it never ending.

My partner at this point was well ahead of me as I took my time. I finally top out on the false summit and can see the final climb. The short ridge walk to the base of the final 1000′ is totally flat and then it’s ALL uphill from there. much like the previous ridge, it seemed to never end but this was MUCH steeper. There are no switchbacks like it supposedly has in the summer to it is straight up. Sucking wind at 13k, and feeling mild nausea during the last 500′ or so made this the longest part of the climb. I was getting pissed bu the end, I was so over it. Eventually you come to yet another minor false summit, BUT you can see the true summit off to the upper left and catch your second wind. This last part was not nearly as steep and ultimately flattens out for the summit ridge and viola! You’ve made it!

For an April climb I was pleasantly surprised how warm it was on the summit. I did Elbert in June last year and was freezing! Proof that you should always be prepared for any and all weather conditions in the Rockies!
Going down was fast but it came with some interesting complications thanks to how slow I went on the ascent. The snow was getting warm, FAST. descending the steep ridge from the summit, my microspikes were clumping snow underneath so I took them off and just walked down the softer snow. Steps were about ankle deep so it wasnt that bad. The second ridge section (mid mountain) had been baking in the sun and was getting really wet. The postholing ranged from ankle to mid calf deep and it was honestly wearing me out a bit. I stopped like halfway down this hill to just let my legs sit, and replenish with some snacks before continuing on.
Finally we were at the pitch just above treeline. This is where it got really funky and honestly wish I hadn’t left my snowshoes in the car. postholing got deep. the steep pitch was actually easier to come down than the flats in treeline. Many of us were getting stuck waist deep in random postholes. It was nearly impossible to avoid unless you had skis on. Even the snowshoers got stuck! It was simply just too warm. The rest of the trees weren’t bad. they were sheltered in shade and the snow was much more solid but definitely slick. Rather than putting my microspikes back on I just went with it and slipped and slid my way to the trailhead.
Despite the annoying ridgeline. This has to be one of my favorite 14er climbs so far. I LOVE the snow and the snowy views made for a very unique experience! I have done some snow peaks here in Utah but there is something special about being that high in the snow.


**NOTE ON AVALANCHE SAFETY** If you are considering a snow hike, please make sure you are carrying avalanche gear with you, know how to use it and check your local avalanche forecast. As the day warmed, our avalanche danger actually increased from moderate to considerable because of the rapid warming. Wet slides were reported all over the Rockies. A resource I HIGHLY reccomend if you are new to winter backcountry is the Know Before You Go course created by the Colorado Avalanche Information Center and the Utah Avalanche Center. This course is COMPLETELY FREE and is a great introduction to avalanch awareness and safety. Ultimately, if you plan to do more serious backcountry adventuring, please take a level 1 certification course from your local avalanche center. The things you learn in those courses are priceless and could quite literally save your life or someone elses life.
This was hands down the easiest 14er I have done so far. I spent more time driving to and from this mountain than actually climbing it. Mount Bierstadt is located on the front range and is known as the most populated 14er due to its close proximity to Denver and “easy” trail.


I left my family cabin in Estes Park around 4am or so. I took me a little less than 2 1/2 hours to get to the trailhead which was a bit quicker than I expected. I started my hike in the dark just as twilight was making itself known. It was cold, and I knew it would only get colder as I made my way up on the shady side of the mountain. I passed the lake in the dark but could tell it was there, and worked my way up the switchbacks from the willows. Once I came up over the hill, I got a spectacular view of sawtooth ridge. I was around roughly 13,000′ when the sunrise began to light up the mountains across the valley.
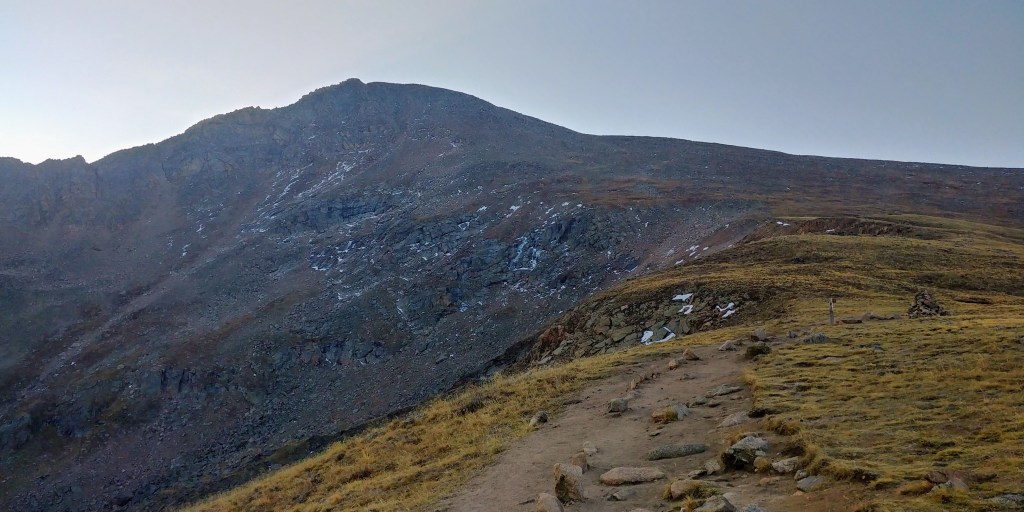
From here it was just slow and steady up to the saddle. The last 250′ vertical or so is the most difficult part, not technically but navigationally. This is an EASY class 2 so if you feel like you are scrambling over boulders you are actually too far off route. There are at least 3 or 4 paths that weave through the rocks to the summit from the saddle. there are cairns, and dirt path through the rocks it is just difficult to keep track of which cairn goes to which route. they all sort of weave in and out of each other so as long as you always have a cairn in line of sight aiming for the summit, you should be good. Typically routes like this are easier to see going down…. in this case, I actually felt like going up was easier to keep track of!
Summit had 360 views. Evans directly to the East, and could see the connection with Sawtooth ridge from the top. Mosquito Range to the Southwest, Greys and Torreys to the West, and Long’s was hiding in the smoke to the North. I can definitely understand why this is the most popular 14er. I got lucky on this fall Thursday and had it all to myself on the summit!

Once returning to the saddle, the rest of the way down was a breeze and I was actually able to jog quite a bit of the descent. The final mile or so at the bottom where it goes back uphill to the car was the worst part of the entire hike honestly. But overall this was a good one! Car to Car was 4 hours, 15 min. Marked my 5th 14er this summer, and 11th overall!
Pikes Peak is known as “America’s Mountain” and is the most popular fourteener in the US (mostly because you can drive up it).

However it is typically known to be one of the harder hikes due to distance and gain. There are 2 main routes. The Barr Trail starts in Manitou Springs and is the standard route. It tracks 26 miles round trip and about 7,600′ of gain but is only a class 1 hike and is not technical. The shorter route is the North West Slopes route outside of Divide, CO at 14 miles round trip and 4,300′ of gain but is a bit more difficult to navigate as it is class 2 near the summit.

This particular report follows the upper portion of the NW Slopes route. The trail parallels Pikes Peak highway one you come out above tree line. My husband and I were celebrating our anniversary this particular weekend and we planned for him to meet me at the summit so for the sake of time and consideration of my husband, I decided to start my hike from Devil’s Playground at around 12,900′, while he shuttled to the top to wait for me. Some might call this cheating, however that is up to you and your preference on how you would like to climb this mountain.
There are a few different “rules” some people consider to count as an official 14er summit. One is that you must climb at least 3,000′ of gain for it to count, another is that you must summit and descend on foot. THIS IS UP TO YOU AND YOUR OWN LEVEL OF PRIDE. There are a handful of 14ers that have high trailheads and less than 3,000′ of gain as their standard route. This is a separate level of achievement some people strive for and one I have zero interest in. The other “rule” is also just a matter of pride for people. When I took my husband up Mount Evans several years ago, we hitched a ride back to our car from the summit because he was suffering from altitude sickness. I still felt we both earned the summit because we did the hard work of the uphill climb to the top.

In the case of Pikes Peak, I had every intention of shuttling back to the car with my husband when I planned this climb. This was probably one of the 14ers I cared least about. I figured if I at least did the work to summit and check it off my list, that is enough for me. Out of 58 14ers, Evans and Pikes are the only two with roads to the summit. I have to do the hard work on every other mountain, I personally don’t feel the need to do the full ascent/descent on this particular peak.


The NW slopes route is 7 miles to the summit. Reaching Devil’s playground marks 2.5 miles left to go. From the parking lot you cross the street to the trail on the other side of the road. (DO NOT HIKE ON THE ROAD. It is not allowed and is dangerous due to traffic) The first stretch of trail from Devil’s Playground is fairly flat and parallels the road until a hairpin turn near some cliffs.

Stay on the road side of the turn wall because walking below the turn wall is VERY shallow and exposed. The trail then does up and over the hill to an open area next to point 13,363′. Follow the trail straight on through this area back to the road’s switchback up ahead.

From here you have about 600′ vert to the summit. The trail steepens and the trail gets more difficult to follow. Keep a careful eye out for cairns as the official trial switchbacks in the rocks and is easy to lose. As you top out the ridge at 14,000′ you can see the final road turn. stay to the left of the road and aim for the weather station on the summit.


This is a LARGE summit area to explore! Current conditions when we were on top had construction blocking off areas of the summit but the new summit house is nearly complete, and the Cog Train should be running again May of next year according to their website. The old summit house was still open so we were able to enjoy the famous pikes peak donuts.
It was a beautiful day and I am glad I got to share the top with my husband (even if he didn’t hike it).
I climbed this mountain for the first time back in 2009. It was at one of the lowest points in my eating disorder, I was freezing and miserable. I also had apparently blocked out parts of this trial from my memory and I now remember why. I am not saying this as a deterrent, this is still a beautiful climb, it was just much more tedious than I remembered. Timpanogos from the Aspen Grove TH is a 16 mile, 5300′ gain climb. The other and more popular route is the Timpanoke route. While it has less gain, the trail is a bit longer, however AG has been ranked as more difficult due to some of the earlier terrain as well. I personally think the Aspen Grove area is prettier with all the waterfalls and less crowded so it is my preferred route to the summit.

We started at 4:15 on a beautiful mid-September morning. Stars were out, meteor shower was in peak and it was incredibly calm. Moving pretty quickly through the first mile to the first waterfall (which we could not see but could hear in the darkness) the trail began up the switchbacks and across primrose cirque all in the dark of night. it wasn’t until we reached the higher falls (which was bone dry this time of year) that we began to get twilight. Working our way up the tight switchbacks waiting for the sunrise, the winds picked up but we were making excellent time. We stopped for a quick break at the top of the couloir as the sun rose. We had been going for nearly 3 straight hours.
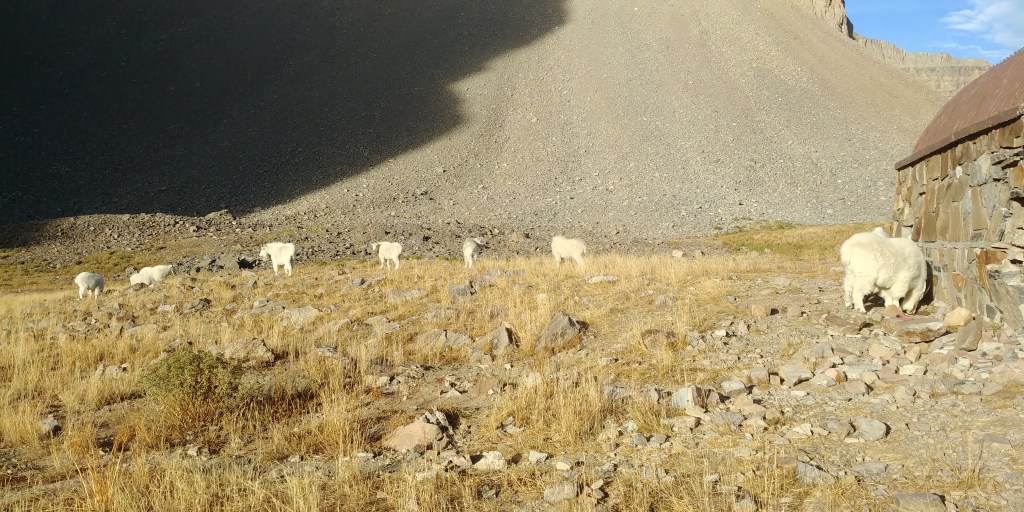
We continued up the last bit of the couloir to the opening of the meadow where we had our first goat encounter and witnessed the suns rays light up the summit ridge in front of us. Strolling along, we made it to Emerald Lake and the shelter where we met our second pack of goats!

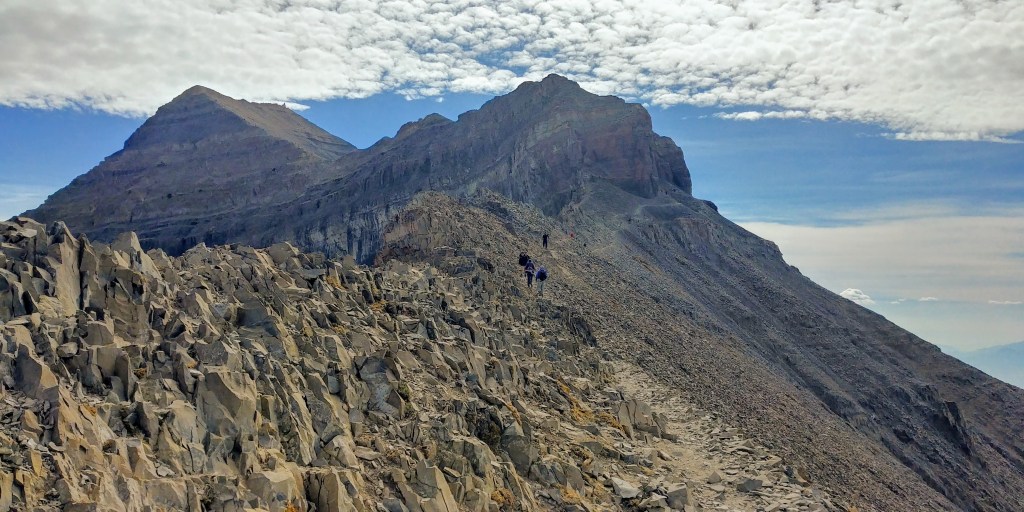
From here things slowed down a bit. Crossing the scree field was not difficult but it was time consuming. Keeping track or cairns, and just walking along the uneven path, ALL of our ankles could feel it by the end. That field was definitely bigger than I remember. onward up the steep pitch to the saddle, we were all feeling the burn, but it wasnt until we topped out on the ridge that the wind was at its peak (as per usual for Timpanogos).

We made our way up the last .9mi to the summit. The trail is exposed the entire way but ridge starts out with well defined trail. the crux of the climb is the chimney. a class 2/3 mix of loose and solid rock scramble up switchbacks sheltered in the rock formation. From here you pop out and its only a few more switchbacks to the final stretch of ridge and the summit is in sight.

On the summit we celebrated a client’s birthday and the overall accomplishment of a major climb for everyone involved! The wind was fierce, and it was cold and crowded so we headed down pretty quickly. Our descent was smooth until we returned to the scree field where ankles were sore and unhappy, slowing us way down and we took our time on the remainder of the descent enjoying the beautiful fall colors we didn’t get to see in the dark on the way up.

Car to car with our group was about 12 1/2 hours. My least favorite part was the crowds… it was like BYU Disneyland up there… If you can, pick a weekday to go. Overall a great day!
What a gorgeous pair of peaks for fall! With the leaves changing, and the bold colors of the mountain, this was a very beautiful climb.

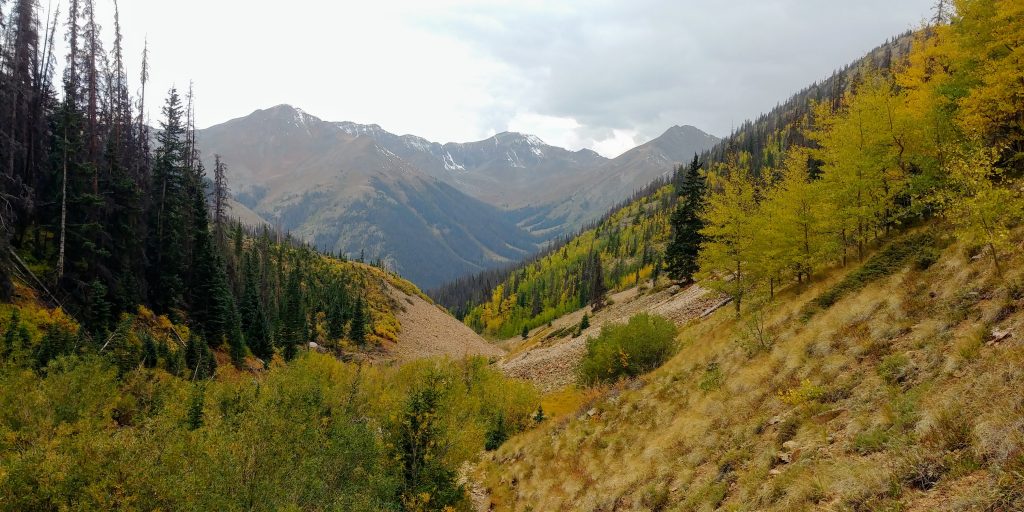
Redcloud and Sunshine are located in the San Juan Mountains of Colorado just outside of Lake City. The climb itself is an easy class 2. t=There are a few points in the trail in which you are navigating scree but the trail is well defined. The scariest part was honestly the rough 4×4 road to get to the trailhead.

We car camped at the trailhead and started hiking at 3am because weather was supposed to roll in early afternoon. Since it is mid-September, starting at 3am looks A LOT different than starting that early in mid-summer. This is the darkest part of the state, hands down due to its remoteness. We spent the first 3 hours in pitch-black as we had no moon, and clouds masked the stars. The darkness slowed us down a bit in spots. At about 1 3/4 miles there are a few scree fields to navigate across and doing so in the dark was a challenge. The key is to hug the stream and not get too high in the scree fields. About 2 1/2 miles in the remainder of the trail to the saddle is well defined a tundra meadow.


By the time we got to the saddle, twilight began to make itself known, just in time for us navigating the switchbacks up the steep scree. We enjoyed sunrise from about halfway up the ridge and slowly made our way to the summit of Redcloud. The red dirt and colors on this mountain are unreal and absolutely gorgeous! We spent a quick moment on the summit before continuing down the ridge to Sunshine.

There is about a mile and a half between peaks and the ridge walk was fairly straight forward. The final pitch to the summit of sunshine is all scree but there is a defined trail and the rocks are fairly stable despite how loose they look. After 20 minutes on the summit we made our way back towards Redcloud to head back down. This ridge walk back to Redcloud’s summit seemed like it took forever and was honestly the hardest part of the climb mentally.
Once we made it back down to the saddle, the rest of the walk down was incredibly quick and very pretty as we could see the colors of the leaves that we couldn’t see in the dark. The views the entire day were absolutely stunning and I HIGHLY recommend this pair. Redcloud in particular is now pretty high on my favorite 14ers list. Car to car was 10 hours. We took our time, especially in the dark. Overall, this was a beautiful day!

These are all VERY common reasons why goals don’t get achieved. Learning HOW to conquer your goals is the secret to making your goals achievable! I want to break down for you a few steps in goal setting that can help you be more successful in actually following through, and conquer the goals you set for yourself!

My high previous school students can attest to this, but maybe you have heard of it too! SMART is an acronym that stands for Specific, Measurable, Attainable, Realistic, and Timely. By giving your goal these 5 criteria, you are already making a more achievable dynamic for yourself. Write them down, break down your goal so you can see exactly what you need to do to achieve it!
Once you have listed these five criteria your goal should sounds more like this: “I want to lose 10 pounds in 30 days by eating a healthier balanced diet, and working out 4 times a week using strength training and HIIT exercises. I will track my food, exercise and progress by scale as well as body measurements.” This is Specific. It has measurable data, it has an action plan, and a realistic timeline.
Let’s talk about steps to conquer your goals. You have set your SMART goal, and come up with an idea of how to execute your plan, which is great, but we need to ensure it sticks. One way to do this is by really breaking down the steps and creating mini-goals along the way. For long-term goals this is especially critical. If you have a goal plan that takes a year or more to complete you need to take it in bite size chunks to make it more sustainable.

Let’s change the scenario to something bigger like preparing for an Expedition. You sign up with several months ahead of you to prepare for it. By breaking it down month to month, even week to week can help you prepare. There are a lot of pieces to your puzzle. not just training, but logistics, and mental preparation as well. By assigning certain tasks to different points in your path to achieving your goal, you create a step by step process to getting it done!
I think of it a little bit like planning a wedding. You set the date, pick your venues first so they are available for the date you chose. Then you pick your bride’s maids, you try on dresses and order a dress, then order a cake, a DJ, etc. and as you get closer, the to do list gets more specific: Get nails done, finish pace settings, centerpeices. The day of: hair, make-up, transport wedding party to venue, follow the schedule of ceremony and reception, etc. You start broad, and get more specific with details as the event arrives and the same can be applied to preparing for an expedition.
For example, you may start with general fitness prep. getting into general shape before adding training specifics. You book your plane ticket, book your expedition guide, get/renew your passport, and any other logistics that must be done first. Then as you get closer to the date, your physical training becomes more specific. You add mindset and mental prep to your routine, you make sure your gear is in good condition and buy or replace anything you are missing. Right before you leave you pack, purchase snacks, supplements, and any other last minute things you need. You check your flight details to ensure everything is still good to go, and head to the airport and off on your journey.
We talked about breaking goals down into smaller timeline chunks such as months or weeks. However, even breaking it down day by day can help if you struggle with procrastination. Creating a daily To-Do List can be a lifesaver and an important key in helpin you conquer your goals. Your brain gets a little hit of dopamine each time you cross something off your list! Even struggling with daily tasks? Try the “Stop Light” method.
Break your daily tasks down into three categories: Things that absolutely HAVE to get done today, Things that should get done, and things that you would like to do if you have the time to get to them. This means everything: goal stuff, work stuff, family stuff etc. Items on your list will shift in priority at various points in time and that is normal, and also kind of the point as you will see below:

You list will change daily. something that was yellow yesterday could be red today. Something green last week could even jump to red this week. This is just a simple way to keep your daily tasks organized and help you prioritize what is most important.

Life happens. Unexpected roadblocks can and will get in the way of us trying to achieve what we want but that should not stop us from trying. If you were training for an event and sprained your ankle, you may be out of commission for a bit but you can still train in other ways, you can focus on mental training, and you can get back on track once you heal. If you sprained your ankle say the day before your event, that is a bigger frustration, but you can always reschedule. Races happen multiple times a year, big ones are annually, and expeditions come in seasons as well. Fighting with the airline and expedition team about refunds is a nuisance, but has to be done in that scenario. In the even of an injury or life altering event, many expedition teams would be flexible and allow you to join them on a different date in the future and transfer your reservation. I know with COVID-19, many of us had cancelled plans, trips, vacations, and events. We continued forward, the goal remains, we just know it’s not now.
Mental resiliency in the face of challenges and adversity is going to be a key skill to learn. This is ultimately what sets people apart in those who are successful at achieving goals, and those who aren’t. We ALL hit road blocks in some form or another, but it is the ability to move past them and keep going. This comes in the form of utilizing coping skills, strategic critical thinking, and planning to push forward.
You can achieve anything you set your mind to if you practice effective goal setting. Lose that weight, climb that mountain, read 100 books an a year, get that dream job, finish that PhD, learn a new language, a new instrument, or simply a new hobby. Implement new habits into your life. Conquer Your Goals! Conquer Yourself!
If you are interested in learning more about how we can help check out our 1-on-1 personal coaching options!